Colorizing Old Memories with Python
Ever imagined you’ll be able to add colors to your old captured memories? These memories can be anything like a picture of your parents in the 70s, an image taken from an old camera, or your sketch.
With the advancements in Deep Learning technologies, this is possible. Here, we are talking about a DL technique that adds colors to your images.

Hi Everyone this is Arsh and in Today’s blog we are going to create an ML model which will add colors to the B/W picture, we will deploy the model as a gradio app on TrueFoundry which is an MLOps platform.
So let's get started.
Importing Libraries
from deoldify.visualize import *
import gradio as gr
import torch
from deoldify import device
Here we are going to use DeOldify which is a state-of-the-art model from Deep.ai which enables us to add colors to our B/W images
Creating our Model func
This function is going to use the colorizer object and transform the source image
colorizer = get_image_colorizer(artistic=True) #getting artistic colorizer
def colorize(image_path):
    '''Colorize a single image'''
    render_factor = 35
    image_path = colorizer.plot_transformed_image(
        path=image_path, render_factor=render_factor, compare=False, watermarked=False) #inference using colorizer object
    return image_path
Building Gradio App
We are going to create our Gradio App and run it on port 8080
with demo:
    gr.Markdown("# B/W Image Colorizer")
    with gr.Tabs():
        with gr.TabItem("Examples"):  # If the user wants to use the examples
            with gr.Row():
                rad1 = gr.components.Radio(
                    ['Image 1', 'Image 2'], label='Select Image and wait till it appears!')  # R
                img1 = gr.Image(label="Image 1", shape=(300, 300))
            submit1 = gr.Button('Submit')
        with gr.TabItem("Do it yourself!"):  # If the user wants to add their own image
            with gr.Row():
                img3 = gr.Image(label="Image 1", shape=(300, 300))
            submit2 = gr.Button('Submit')

        def action1(choice):  # Function to show the article when the user selects the article
            global filepath
            if choice == 'Image 1':
                filepath = 'test_images/image.png'
                return 'test_images/image.png'
            elif choice == 'Image 2':
                filepath = 'test_images/image2.jpg'
                return 'test_images/image2.jpg'

        # Change the image when the user selects the image name
        rad1.change(action1, rad1, img1)

        # Output for the Highlighted text
        op = gr.components.Image(label="Colorized Image", shape=(300, 300))

        gr.Markdown(
            "### Made with ❤️ by Arsh using TrueFoundry's Gradio Deployment")
        gr.Markdown(
            "### [Github Repo](https://github.com/d4rk-lucif3r/Feature-based-Similarity-Index)")
        gr.Markdown(
            '### [Blog]()')

        def fn(img1):  # Main function
            global filepath
            result = colorize(filepath)
            return result

        submit1.click(fn=fn, outputs=[
                      op], inputs=[img1])  # Submit button for the examples

        # Submit button for the user input
        submit2.click(fn=fn, outputs=[op], inputs=[img1])
demo.queue()  # Queue the block
demo.launch(server_port=8080, server_name='0.0.0.0')  # Launch the gradio block
Both snippets are part of app.py
Test Drive
Running our App by using:
python app.py
Voila! it runs, Now we will work on deploying this.
Deployment
We are going to use TrueFoundry for our deployment
Logging into TrueFoundry

Heading to Deployment Section
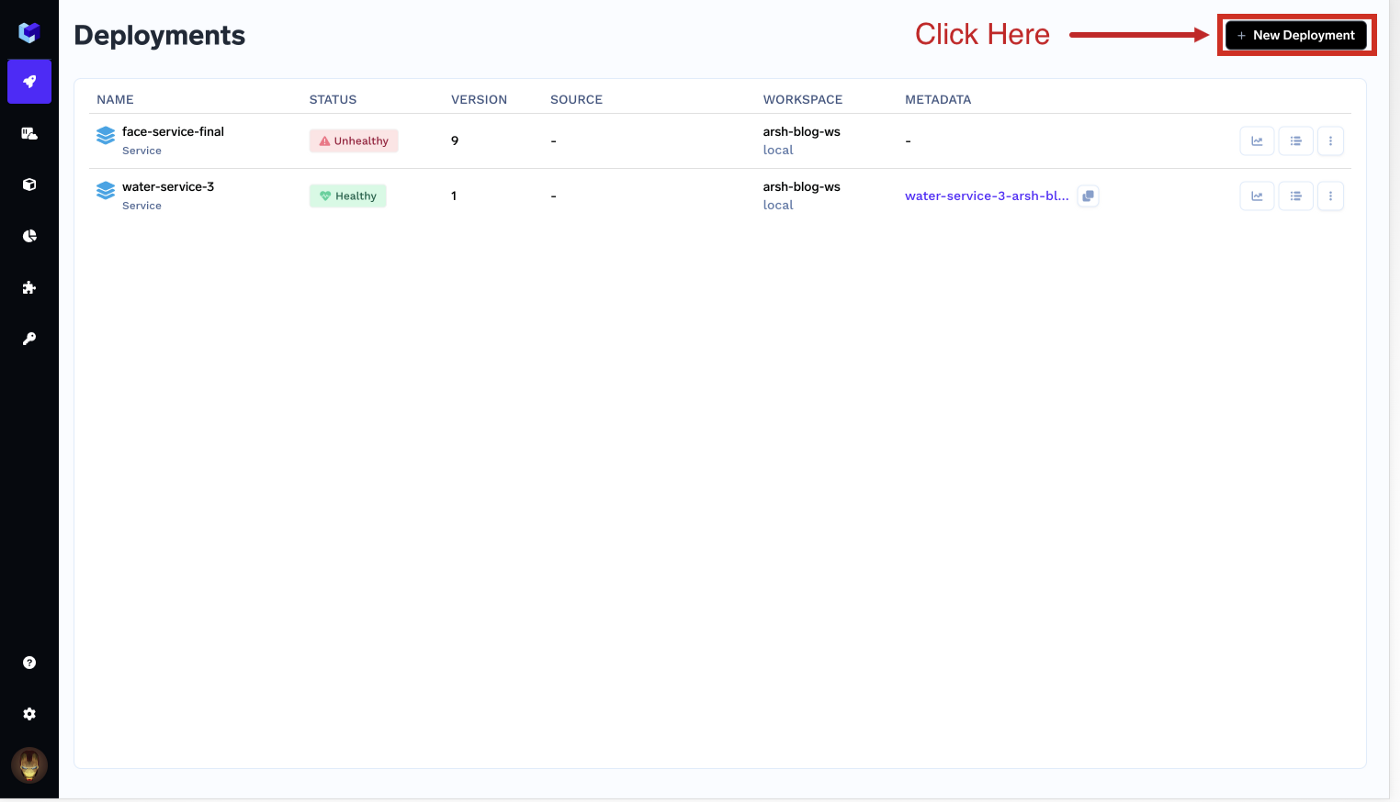
1) Creating a new deployment

2) Select the Service option and Workspace name

3) Fill out properties and submit

4) Deploying

5) Successful Deployment

6) Final Thoughts
After the deployment, you will be able to use the Gradio App.

The app is deployed here: https://image-colorizer-demo-projects.tfy-ctl-euwe1-production.production.truefoundry.com/
Video
Code
The above code is also present in my Repository
References:
- TrueFoundry: https://truefoundry.com/
- TrueFoundry App: https://app.truefoundry.com/
- TrueFoundry Docs: http://docs.truefoundry.com/
- Code: https://github.com/d4rk-lucif3r/Image-Colorizer-App
- DeOldify: https://github.com/jantic/DeOldify
- My Fork of DeOldify: https://github.com/d4rk-lucif3r/DeOldify


